Sunday, December 18, 2011

Etsy Anniversary gift. Personalized print.


I ordered this print from an Etsy seller for my husbands first anniversary gift. I'm so happy with it!

I ordered the print on Thanksgiving and it was in my inbox the next morning! (She makes it and sends it via email.) For $10!!!

It doesn't get any better than that.

I was able to easily print it, frame it and wrap it to put in the husbands Christmas box. <3

Go check her out!

Sunday, December 11, 2011

Project 365: Day 103~ choco-zuchinni cupcakes

We have a birthday at work tomorrow so I threw together some cupcakes today to take with me.

I found this recipe for Choco-Zucchini Cupcakes and I hope she will love them! 

Instead of the peanut butter frosting listed on the BHG website I went for my old standby... cream cheese frosting. It's so fun to get to cook some of these pinterest finds! My frosting did not come out as thick as it did last time, but the cupcake I taste tested was great. I hope the birthday girl thinks so too!


Sunday, November 27, 2011

Anthro inspired "flowers" and toothbrush holder


Thanks to my mom supplying me with styrofoam balls and Pinterest for supplying me with too many things I want to make....

Really, thanks.

This weekend when I couldn't sleep I cut up a bunch of q-tips and made these anthro inspired q-tip flowers.

I just cut q-tips in half, glued hot glue to secure them in place and used a dowel as a "stem".

The idea originally (I believe) came from awesome blogger.


I'm still undecided if I will paint my ends or not. I kind of like the plain white, but we shall see what happens!


Also, while I was at it, I threw all of my leftover glass rocks into a vase and created a new toothbrush holder. I still need to pick up some new rocks, but I am loving the way this looks!

Sunday, November 20, 2011

Project 365: Day 82: Broccoli Cheese Soup


Well, you know that I am pretty much in love with my crockpot. It's slowly becoming my Sunday night dinner tradition in fact. Today was no different.

It's getting really cold, really fast here so this was a great dinner tonight!

Ingredients:
3 cups milk
2 Tbsp. Butter
2 cans cream of chicken soup (undiluted)
1 lb velveeta, cut into cubes
1 bag Steam Fresh Broccoli

Cook broccoli according to package instructions. While broccoli is cooking,
combine milk, butter, velveeta and soup into the crockpot. Chop
up the steamed broccoli and add to the crockpot. Stir together.

Cook on high for 3 hours.

It was delicious served with hot ham and cheese sandwiches!


Monday, November 14, 2011

Project 365: Day 72: Recipe: Spinach chicken alfredo


New meal I tried out last week!

This was super easy, and the kids approved. Plus we had a ton of leftovers, which is always a good thing!

1 can of cooked chicken
1 jar of alfredo sauce
1/2 block of thawed spinach
1 box of penne pasta noodles
Moz. cheese (1 cup)


Boil noodles and chicken together until soft. Combine spinach, alfredo, chicken and pasta into a casserole dish.

Cover with mozarella cheese. Bake for 15 minutes or until cheese is melted.

Saturday, October 29, 2011

Fun Fall(ish) wreath!

Well, it's kind of Fall-ish.

I felt like I really needed a new wreath to hang on my door for fall, so this is the baby I put together last night.

I used a foam wreath form from Dollar Tree. I think it's actually for floral arrangements to put around candles that sit on a table, but it got the job done.

I picked up a roll of tan tulle from walmart for less than $3 and cut it into strips. There are 25 feet in a roll and my pieces were approx. 1 foot each. After I cut all of the pieces I tied them around the foam.

I made rosettes using instructions from this site:

They were sooo easy to make! I used a glass to make my circles and then just cut spirals. I glued the flowers using my trusty hot glue gun.

So cheap, so easy, so fun!

Tuesday, September 20, 2011

Recipe: Pizza Pockets


My friend Brandie gave me this idea and I was so excited to run with it!

Ingredients:
1 pkg of dry biscuit mix
Pepperoni
Mozzarella Cheese
Pizza Sauce

Prepare biscuit dough as directed on package.

Separate the dough into three (or four, however many you are making) balls.

Shape each ball into a flat circle. Mine were about 5 inches wide.

Spread Pizza Sauce on each circle.

Sprinkle Moz. Cheese on one half of each circle.

Fold the circles over, pinch the edges to close and bake in the oven at 425 degrees for 10- 12 minutes.

DELICIOUS!

Rae informed me that next time I need to make a double batch so she can have two.

I'm thinking I want to make breakfast sandwiches next?

Monday, September 12, 2011

Recipes: Bacon wrapped pork chops and asparagus


I had a major dinnertime score last night. Bacon Wrapped Porkchops, asparagus, and shells n cheese!

For the chops:

4 porkchops
8 slices of bacon
seasoning
oil
butter

I trimmed the bones and the fat off of the porkchops and wrapped bacon around the edges, securing with toothpicks. I sprinkled with Season Salt and garlic salt on each side.

Preheat oven to 425.

Heat up oil and a tablespoon of butter in a skillet. Brown porkchops on each side. Remove from heat and put chops in a greased pan.

Bake for 20-25 minutes until chops are cooked throughly and bacon is crispy.


The aspargus is super easy also!

Break the ends off of the asparagus and wash the stems.

Place in a pan with with enough water to cover the asparagus completely. Add 2 tablespoons of butter.

Heat to boiling, cover and steam for 5 minutes.

Remove lid and remove from stove. Place in the oven and cook for twenty minutes. (425 degrees)

The kids LOVED it all!

Monday, September 5, 2011

Stuffed Bacon Cheeseburgers

Even though I don't have a grill... or a backyard I still wanted to make sure we had something "Labor Day-ish" for dinner. These cheeseburgers were voted by my household the best burgers ever.

1 lb beef
cheese singles
bacon bits (the real bacon kind)
1/4 tbs. garlic salt
1 tbs. Worcestershire sauce
1/2 tbs. season salt

Mix the beef with seasonings and Worcestershire sauce. Form into eight thin hamburger patties. Top 4 patties with 1/4 of a slice of cheese and some bacon bits.

Place the other four patties on top of the patties with bacon and cheese. Pinch the edges to seal the two together.

Grill.

Top with more cheese if you would like (I did... yummy!)

Enjoy!

Wednesday, August 31, 2011

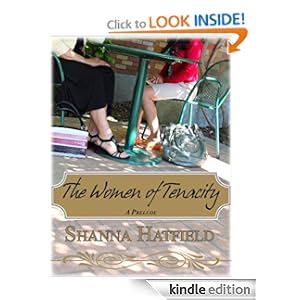
Book 2: The Women of Tenacity by Shanna Hatfield


Well, I sat down and read another freebie Kindle book from Amazon tonight and I fell in love!

This was another short read. It's about three women that are friends and just talking about their day while they are eating dinner.

Ok, that sounds boring huh? Well, It's really not. It has a great story line, all the characters were so lovable and I am now dying to read some more by Shanna Hatfield.

Soon, very soon! I suggest you go check it out NOW! :)

Tuesday, August 30, 2011

Wedding Recap Part 2: Getting ready!


I was soooo super happy to get to spend some time getting ready with all the girls. Especially in grandma's pink bedroom where there is no mirror (genius!)
I did the kids hair. Fish thought it would be a great time to jack with my phone. Thanks child.


Rae pretty much ditched us to watch Spongebob or something.

A totally rocked her dress, since she LOVES dresses.

S wasn't forced to wear a dress since she was busy enough being my officiant and my photographer. THANK YOU!


I did my hair. It only took three tries and almost some tears, but I got er done.


FYI: when getting dressed... make sure the blinds are closed. I remembered when I was about half naked.

GO TEAM.


The boots were a hit and beat the heck out of heels for a backyard wedding!

Wedding Recap Part 1. It's all in the details.


The beautiful cake my Momma made! She used Duncan Hines chocolate marble cake mix and it was AMAZING. Thank you Mom!


The chair set up with the archway in my Grandpa's backyard. He did an excellent job mowing. (He wanted to know that someone noticed.)


Table set up! I used pinecones as placecard holders and hot glued the placecards in place inside them.


The kiddie bags acted as the kids placecards.

Close up of the centerpieces. Wine goblets from Dollar Tree filled with river rocks from Dollar General and a votive candle.


Close up from the guest book table. The basket contained the mad libs and the tears of joy packets.

Escort cards! I cut the leave escort cards out with my cricuit and decorated clothespins to hold them onto twine that I strung between two porch railings. The "flowers" are made from newspaper and spray painted.


Stay tuned for more! I'll do all I can tonight, trying not wear myself out completely!

Thursday, August 25, 2011

Pink and Zebra Print Birthday Party!

Sorry all, I know my posts are few and far between right now, but with the hubby home... well you know how it is. ;)

The day after he got home we had my 9 year old's birthday party. She is all about zebra print right now so we ran with it (thank God I talked her out of another Twilight party!)

We played Pin The Tail on the zebra! I found a zebra on a google search and erased his tail using Paint. I printed it off poster sized and taped it up. The girls used pieces of black ribbon for the tails. Of course, I didn't manage to get a picture. (sigh) but here is the zebra!

The cake was a cupcake tower. We had chocolate cupcakes with cream cheese icing. The icing was AMAZING! I hate hate hate icing, except for this kind. I fell in love and could have ate the entire bowl.


The cupcake wrappers were made with love by ME! They were so easy to make. I used the template from Skip To My Lou and managed to get 7 wrappers on each 12 x 12 inch piece of scrapbook paper. Once the cupcakes were ready I put the wrappers around them and taped them into place.

Rae also had her mini candy buffet. It would have been the wedding candy buffet but it was way to hot for an outside candy buffet. Rae loved it though!


I also made her a super cute banner. Her name is now hanging above her bed. It matches her new bedding perfectly!

I cut the zebra paper into 4 in x 6 in rectangles and then cut out the letters on hot pink paper with my Cricut. I stapled all of the zebra papers to some black crepe paper and hung them up in the kitchen.


I got her zebra bedding from walmart. She adores it! (don't ask about the cardboard behind her bed, it was her sisters racecar until it died.

All in all it was a great party. (no idea why her hair is yellow in this picture!)

 I'm pretty sure the BEST part was suprising the girls the night before when we picked up their stepdad at the airport. It's been an AMAZING leave!

Thursday, August 18, 2011

Hot Spinach Dip

I made some Spinach dip tonight to go with dinner and Oh-Mmm-Geee, it was GOOD. Not just kinda good, but so good I could have sat at the table and ate it all for dinner...

But the best part? The kid approved! Not just the four year old kid that will eat anything that you put on her plate... my super picky-vegetables are gross- I refuse to try it- (almost) 9 year old ate it right up.. and asked for SECONDS! Heck, she would have had thirds, but she wanted to save some for her step-dad.

People, this is kind of a big deal. Honestly, I wasn't exactly sure how to react. But, I went with it.

Anyway, here is the yumtastic recipe:

8 oz. of cream cheese
1/4 cup of Mayo
1 Tbsp. Garlic Powder
1 block of frozen spinach, thawed and drained
1/2 cup of Parmesan cheese

Preheat the oven to 350.

Mix all ingredients together. Dump the mixture into a glass pan. Bake for 20 minutes.

Could be served with crackers or tortilla chips. I served it with garlic bread.

Wednesday, August 10, 2011

Table Numbers~ round two!

Well, since the whole dynamic of the wedding was changed, I decided to make a few things a little bit more country. One of those things were the table numbers.

Now we only invited 30 people, so we only need 4 tables. I found four country-ish pictures online, printed them off, put them on some cute scrapbook paper and added table numbers. I kind of heart them. :)

This one has our initals... How perfect is that?!


Tuesday, July 12, 2011

Homemade Taco Pizza


Disclaimer: I LOVE to cook. I can cook pretty well, but I don't cook "pretty". My mom can decorate  cakes like no one else I know... they are gorgeous, but I just didn't get that gene. So... my pizza is a little funny shaped. Sorry dudes.

Anyway, this was so easy to make and everyone in our house loved it. The first time I suggested taco pizza to my 8 year old she looked at me like I was crazy. But she ate her words (and two pieces) tonight.

Homemade Taco Pizza

Ingredients:
*Box of Jiffy Pizza Crust
*One can of refried beans
*1 1/2 cups of shredded cheddar cheese (estimated)
*One medium tomato, diced
*1 1/2 cups (estimated) shredded lettuce
*crumbled up nacho flavored Doritos
*salsa and sour cream for topping

Prepare the pizza crust as directed on the package. Prebake the crust for about 5 minutes.

Remove from the oven and spread refried beans in a thick layer on over the crust, sprinkle with cheese.

Bake for another 10 minutes or until crust is golden and no longer doughy.

Remove from oven and allow to cool.

 Top with lettuce, tomatoes, cheese and chips.

Serve with sour cream and salsa.

Yummmm!

Sunday, July 10, 2011

Glass Jar Laterns

Well, I finished another wedding project, since this WILL happen someday I'm sure. I have been saving glass jars from spaghetti sauce and alfredo sauce and those types of weird things and this weekend I put them to use in such an easy way!

This weekend I used some of that leftover twine to make hangers. I just tied them tightly under the lip of the jar and they are ready for packing at least.

I will be filling the bottoms of the jars with sand and battery powered candles to hang around the "reception area".

Trash to Treasure: Bathroom wall decor!


While most of my poor little apartment is filling up with fun wall decor, my bathroom has remained kind of naked. I spent a lot of time searching high and low for something to hang on the walls... but I still find it odd that I found my answer on the label of a shampoo bottle. Too much time spent laying in the bathtub? No such thing!

Anyway, once I had this grand idea it was definetely go time! The original plan was to pick up some pieces of unfinished wood at Hobby Lobby and paint them before adding the words. But I just could not justify spending that much money on something I was going to cover... so I had a great idea while walking around the store. Why not use something I already have?

My storage unit is full of boxes. I don't want to part with them because I know we will not be staying in this apartment forever (Please God Please let me be right!) so I found the box from my laptop and got to work. Each piece is probably 20 inches long and six inches wide. I cut them out with scissors (I really still need to buy a box knife by the way) and decopagued some adorable scrapbook paper I picked up during my Hobby Lobby trip. Once I was done, I cut out the words with my Cricut (of course!) and glued them into place before sealing each piece with Modge Podge. I used some leftover twine from my wreath project to connect them all with hot glue and to hang it on the wall.

I love the way it turned out! And it only cost me $1.77 (plus tax) for paper! Plus I got rid of yet another box taking up space in my storage.


How's that for reduce, reuse, recycle? :)

FIY: I linked this up onto the link party at Craft-o-Maniac... go check her out NOW! She's pretty amazing!

Wall Decor thanks to the dollar store!

I loooove me some Dollar Tree. Almost as much as Hobby Lobby in fact! I am always finding great things there on the cheap. If I have supplies to buy I ALWAYS check there first.

One weekend I hit the Dollar Tree looking for nothing in particular and ended up with an 11x14 wooden frame (just for a buck, are you serious!?) and a wooden plaque with a bird painted on it.

This is what they turned into:


First, I attacked the plaque. I simply decopagued a piece of scrapbook paper to it and added a fleur de lis from my Home Decor cricut cartridge. I cut it onto a piece of black posterboard and then sealed it all together with some modge podge! 

Dollar stores are such a great place to find wooden signs and plaques to reuse for crafts. You could spend $2 or more for an unfinished piece of wood at a craft store (depending on the size). So I always check out Dollar Tree for signs that I can repurpose!
Next was the frame. I started by painting the wood black... because I am very specific about all of my frames matching.

 I again used my Home Decor cartridge to cut out "forever" in black posterboard and laid it on top of some scrapbook paper. I used the paper that came inside the frame to make a "mat" and just put the scrapbook paper on top of it.

After sealing that into the frame I cut out the adorable heart on some black vinyl and attached it to the outside of the glass. Kind of a 3D effect I suppose?

Anyway, I love the way they both turned out. My walls are slowly filling up!

I told GI that once he gets home the house is going to filled with homemade stuff and I wasn't kidding. I think he's just happy that my supply shopping trips are less than $5 each!

Sunday, June 12, 2011

No Sew Trick or Treat Bags!


I know I know.... it's a little early to be thinking Halloween, but for some reason I always start thinking Halloween around June. Weird? Yeah probably.

Anyway, I had a ton of Halloween ribbon laying around from making bows last year and thought it would be fun to make trick or treat bags for my daughters that they can use over and over again instead of cheapy bags or plastic buckets. So, I sprung into action. :)

I found a couple of medium sized black tote bags in the makeup section at Dollar Tree (love that store!). And knew they would be prefect for the job.

First, I wrapped wide green ribbon around each bag, securing it with hot glue all the way around. I put the end of the ribbon on the back of the bag so I wouldn't have to deal with the bag seams. Once that was in place I added the halloween ribbon in the same fashion. I topped it all off with a bow and ta-da! This took less than an hour to make both and no one else will have the same trick or treat bags this year!

Wednesday, June 8, 2011

Quote of the day! Audrey Hepburn

Just a quick image of one of my favorite quotes! Have a great day everyone!

Thursday, May 19, 2011

Easy Cheesy Meatless Lasagna

I am always looking for ways to keep my grocery bill down. One of the best ways I found is by doing at least one meatless meal a week. This is a new one I tried this week. The kids LOVED it. My oldest even had seconds!

3 Lasagna noodles
jar of spaghetti sauce
1 tub of ricotta cheese
1 cup of mozzerella cheese
1/2 cup of parmesean cheese

Preheat the oven to 375.

Boil the lasagna noodles until soft. Meanwhile, mix together the ricotta cheese and 1/4 cup parm cheese.

Put 1/4 cup of spaghetti sauce on the bottom of an 8x8 pan. Cut each lasagna noodle in half and lay two of the halfs side by side on top of the spaghetti sauce. Next, take 1/2 of the cheese mixture and spread it on top of the noodles. Add 1/3 of the spaghetti sauce.

Repeat the first layer with two more noodle halves, the rest of the cheese mixture and more spaghetti sauce. 

For the third layer use the two remaining noodle halves, the rest of the spaghetti sauce and top with moz cheese until it is well covered (about a cup). Sprinkle with 1/4 cup of parm cheese. Cover with foil and bake for about 20 minutes.  Let cool for 5 minutes before cutting and serving.

Yumtastic. :)

Tuesday, May 17, 2011

Weddin' Signs

So, I saw an idea of using barn wood to make signs for a wedding a long time ago, but my venue didn't really allow you to stick stuff in the ground, so I had let it go.... until now.

Since we have moved locations, I know that I can use them so I thought I would try a low cost approach.

I still had some cardboard left from my "R" project and cut up the rest of the box to make the signs. I painted them white, added letters and arrows that I cut out with the cricut on some white posterboard and then attached some wood dowels with hot glue. I doubled them up on the big sign since that one is a little bigger and will be by the highway. :)