Sunday, January 27, 2013

Mason Jar Utensil Holders

Happy Sunday All! I hope everyone had a great weekend! Our weekend was crammed back with not only Fish's 6th Birthday party yesterday, but my nephews 6th Birthday Party today. 

I don't know about everyone else, but I'm all partied out. Since I was going and going all weekend, I didn't accomplish much housewise (like the laundry I just realized I didn't do, GO ME), but I will show off something J did for me last week: Mason Jar Utensil holders! (Please feel free to go ahead and ignore the ugly range hood and cooktop... we will replace them one day, I swear!)


We just used took three wide mouth mason jars and screwed them to the wall using metal strapping and filled them with some of our random kitchen utensils. Now I have more kitchen drawer room AND I don't have to walk across the kitchen to get a spatula... because that would be EXERCISE and who has time for that? (Kidding, mostly).

Do you have any amazing tricks for using wall space for storage? I'd love to hear them! 


I am linked up at: http://www.craft-o-maniac.com/2013/01/party-time-please-come-link-up.html 

Go join the party! :)


Sunday, January 13, 2013

The Great Reveal: Kitchen Remodel


Once upon a time.... long, long ago this was my kitchen.


 Ok, I guess it wasn't all that long ago. We moved in to this house just 5 months ago. Maybe it just feels like we've lived here forever?

The hubby had two weeks off of school for Christmas and he devoted that two weeks to working on our kitchen. 

Here is the final outcome:


The first thing he did was replace the lovely peach counter top with this DIY stained wood counter top.


The inspiration came from here.
The stain we used is from Minwax and the color is Black Walnut. 

He painted the cabinets white with trim and cabinet paint from Better Homes and Gardens (bought at Wal-mart). 

The wall color is:
Red Rose Bouquet from the Glidden Brilliance Collection (Wal-Mart)


Here is another Pinterest idea put into action! Dish Soap in an oil bottle... much nicer than a bottle of Dawn! I'm not sure where the original pin came from, but I found it here.

 I'm a junkie for anything that will save me some cabinet space! And is it just me, or does a rolling pin fit exactly NO WHERE?!
We fixed this issue by hanging up two coat hooks (purchased from Wal-Mart for $2.97 each) and using this as a rolling pin holder. 
We also picked up a rake there for $8 and cut off the handle to use as a wine glass holder. I've been wanting to do that one for a long long time. Now, I just really want some wine. :-/
On top of it all is the magnetic board my friend Amanda made me, before up and leaving me to go off to college. I know, how dare she better herself and her life. Gah. (just kidding... mostly)
Amanda made this magnetic board by attaching scrapbook paper to a piece of sheet metal and then punching holes in the sheet metal to string a piece of ribbon to hang it with. She even made some cutesy button magnets for the board. I'm sure it'll be full of notes and paper in no time!


This is one of my favorite additions! The hubby built shelves in the open wall space next to the entrance into the kitchen. Perfect spot for my cookbooks, cookie jar, and some fun knick knacks!

I got the "Faith" sign, the bird and the owl at Hobby Lobby on Saturday afternoon. On the top shelf I also have my "Redneck wine glass" the husband bought me at Bass Pro a couple weeks ago. 

Inside a couple of the cabinet doors we installed these spice clips to help fix part of our spice hoarding problem. I don't mean to point fingers, but my spice collection has doubled since my husband got home. Hmmm.... fishy, huh? We ordered the Spice Clips from Amazon.com for $7.95 for a set of 20. This is a GREAT deal. We ordered two sets and I plan to use some in my craft room. :)

We still have quite a bit that we are planning to do in there, but for now at the least the house is about ready for a birthday party in a couple of weeks! 

What do you think so far?


Note: Now linked up over at http://www.craft-o-maniac.com/

Sunday, January 6, 2013

Egg and Bacon "Muffins"


I found this recipe via Pinterest from http://www.fatgirltrappedinaskinnybody.com/2011/04/bacon-egg-cups/ and they are the perfect grab and go breakfast!

I made these a month or so ago and they are amazing, so today I made another batch for this week. 

Here's what you need:

8 eggs
1/2 cup shredded cheese
1/4 cup milk
12 pieces of bacon
salt and pepper for seasoning
Makes 12

Preheat oven to 350.

Spray a cupcake tin with non-stick spray.  Line each cupcake opening with a circle of bacon.

Mix together eggs, milk and cheese in a bowl. Season with salt and pepper. 

Fill each cupcake opening about 2/3 full with the egg filling. I used a 1/2 cup measuring cup to fill each one. 

Bake for 30-35 minutes or until the eggs are no longer jiggly. 

and ENJOY! 


Sunday, December 2, 2012

Cynthia's Chili


It seems like I only ever plan to make chili when it is unseasonably warm outside. Since it was 71 degrees on December 1st I made chili last night.

  My friend Cynthia brought this to one of our work potlucks a year or so ago and I could have ate it all day long. Ok, I pretty much did. Anyway... here is the recipe. Make it. Eat it. Love it.

Cynthia's Chili
1 lb ground beef
1 pkg chili seasoning
1can Rotel (Chili fixins)
1 can chili beans
1 can red beans, drained and rinsed
1 can dark red kidney beans, drained and rinsed

Brown hamburger and drain. Stir in seasoning, Rotel and beans. Heat until boiling. Eat.

Last night we had Frito Chili Pie. Today I had chili with tortilla chips because that bag of Fritos was long gone. :)

Sunday, November 11, 2012

Hallway photo shelves and office area- Living room part two!

Hey everyone! I know I haven't posted in a while, but things are busy around here! I've signed up to do my FIRST EVER craft show in December, so pretty much every spare second I have is being spent working on products for the show. Cross your fingers for me... hopefully it will go well!

In the meantime we have managed to finish up a couple of fun projects for the living room area. I found this awesome project on Pinterest via this blog: http://ana-white.com/2010/10/plans/ten-dollar-ledges

The hubby just followed her AMAZING tutorial and I am soooo happy!

 
AND we started working on the office area.
 
(had to blotch out all the personal info on our papers.. lol )


I had a poster frame and no where to hang the poster itself so I repurposed it into a dry erase calendar. All I did was draw out the calendar grid on scrapbook paper and put it inside the frame with some decorative scrapbook paper. We used a dry erase maker to number the days of the month and to add on all of our to do's. Then, I modge-podged scrapbook paper onto clipboards and now we each have one for our random piles of paper that love to build up around the house.
 
Pssst... do you love the salmon wall next to the printer? Our craft room/office used to be the kitchen in this house before they remodeled in the 80's. We took down the peach wall paneling and discovered salmon walls! Under the salmon used to be pea green. Sexy.....
 
This weekend we painted over the salmon with Latte by Sherwin Williams. I can't wait to get some more done and show it off! :)
 
'Til then! <3 p="p"> 

Saturday, October 20, 2012

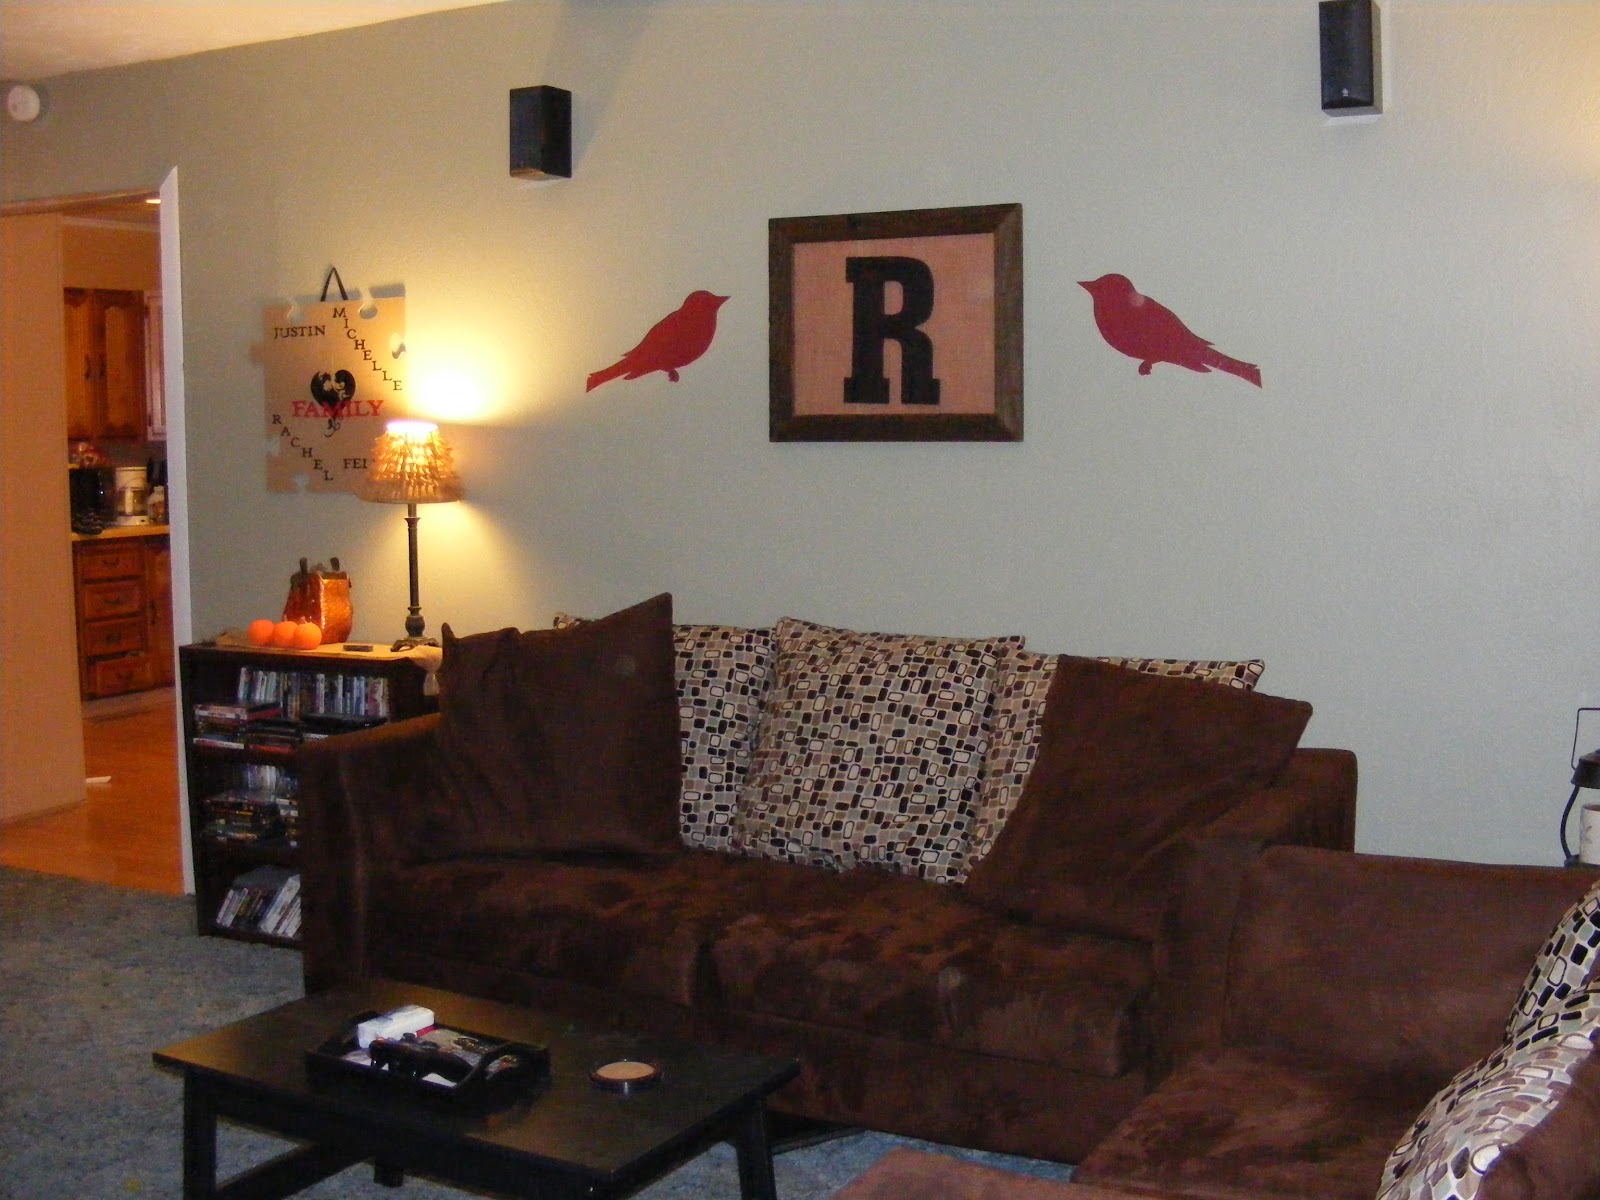
Living Room Revamp Part 1

When we started working on the house, the husband and I came to an agreement. We would only paint every other weekend so we don't wear ourselves out. See how long that lasted?
 
Not long at all. But, the kids were on fall break this week so I took a three day weekend. And I couldn't stand to look at my living room any longer!
 
Over the past few weeks DH has been busy! He removed the drop ceiling in the living room and ripped down all of the lovely 80's wall paneling. The previous owners painted ALL the paneling peach. Lovely huh?
 
Here is the living room the weekend we moved in. Even our stuff couldn't camoflauge the peach!
 
 
We didn't finish EVERYTHING this weekend, but we did get quite a bit knocked out. We painted the walls with Sherwin Williams Svelte Sage (this may be my favorite sage color EVER). Then we just got to work on the decor.
 
We used an old barnwood frame I had from the apartment for the R.
 
I covered the backing of the frame in burlap. In order to hold the burlap down to the cardboard I just used some adhesive spray glue. Then, I hot glued the R to the top of the burlap. Easy Peasy.
 
 
The birds are stickers that we made! We used my Cricut and my Home Decor cartridge to cut them out with red vinyl and the hubby stuck them to the wall for me!
 
I can't wait to get some more done, but we've already made a lot of progress!
 
More to come! :)


Saturday, October 13, 2012

Master Bedroom Redo!

It's been another busy weekend in this house! This time we attacked our bedroom. It doesn't even feel like the same room.

Here is the before we moved in photo:


Don't act like you aren't jealous of those sexy lace curtains. Too late, I've already donated them to the thrift store... sorry guys.
Anyway, here are the after photos!

Welcome to our room! We bedding is from Kirklands.com for $99.00! (I am totally in love and can't wait to sleep in it tonight!)

The X's and O's are 9.5 inch letters from Hobby Lobby that I painted black and the hubby hung up with double sided poster strips.

The paint color is Samovar Silver from Sherwin Williams. As far as I'm concerned it's the PERFECT silver/blue color.

Also, have I ever mentioned that my husband BUILT me this bed? Yep, ONE DAY while he was home on leave when I was at work. Amazing.


Here is the dresser we repainted black last weekend.

The branches on the wall are painted on. I cut the branches out with my Cricut. (Home Decor Cartridge) Then, I used my projector to project them on the wall. After they were in place I traced them with chalk and spent practically half of my life painting them by hand.

Ok, just kidding. It was only a couple of hours. And totally worth it.

We made the "God gave me you" sticker with my Cricut and some vinyl.


All in all, I'm very happy with our progress! The living room is next! :)