Saturday, October 20, 2012

Living Room Revamp Part 1

When we started working on the house, the husband and I came to an agreement. We would only paint every other weekend so we don't wear ourselves out. See how long that lasted?
 
Not long at all. But, the kids were on fall break this week so I took a three day weekend. And I couldn't stand to look at my living room any longer!
 
Over the past few weeks DH has been busy! He removed the drop ceiling in the living room and ripped down all of the lovely 80's wall paneling. The previous owners painted ALL the paneling peach. Lovely huh?
 
Here is the living room the weekend we moved in. Even our stuff couldn't camoflauge the peach!
 
 
We didn't finish EVERYTHING this weekend, but we did get quite a bit knocked out. We painted the walls with Sherwin Williams Svelte Sage (this may be my favorite sage color EVER). Then we just got to work on the decor.
 
We used an old barnwood frame I had from the apartment for the R.
 
I covered the backing of the frame in burlap. In order to hold the burlap down to the cardboard I just used some adhesive spray glue. Then, I hot glued the R to the top of the burlap. Easy Peasy.
 
 
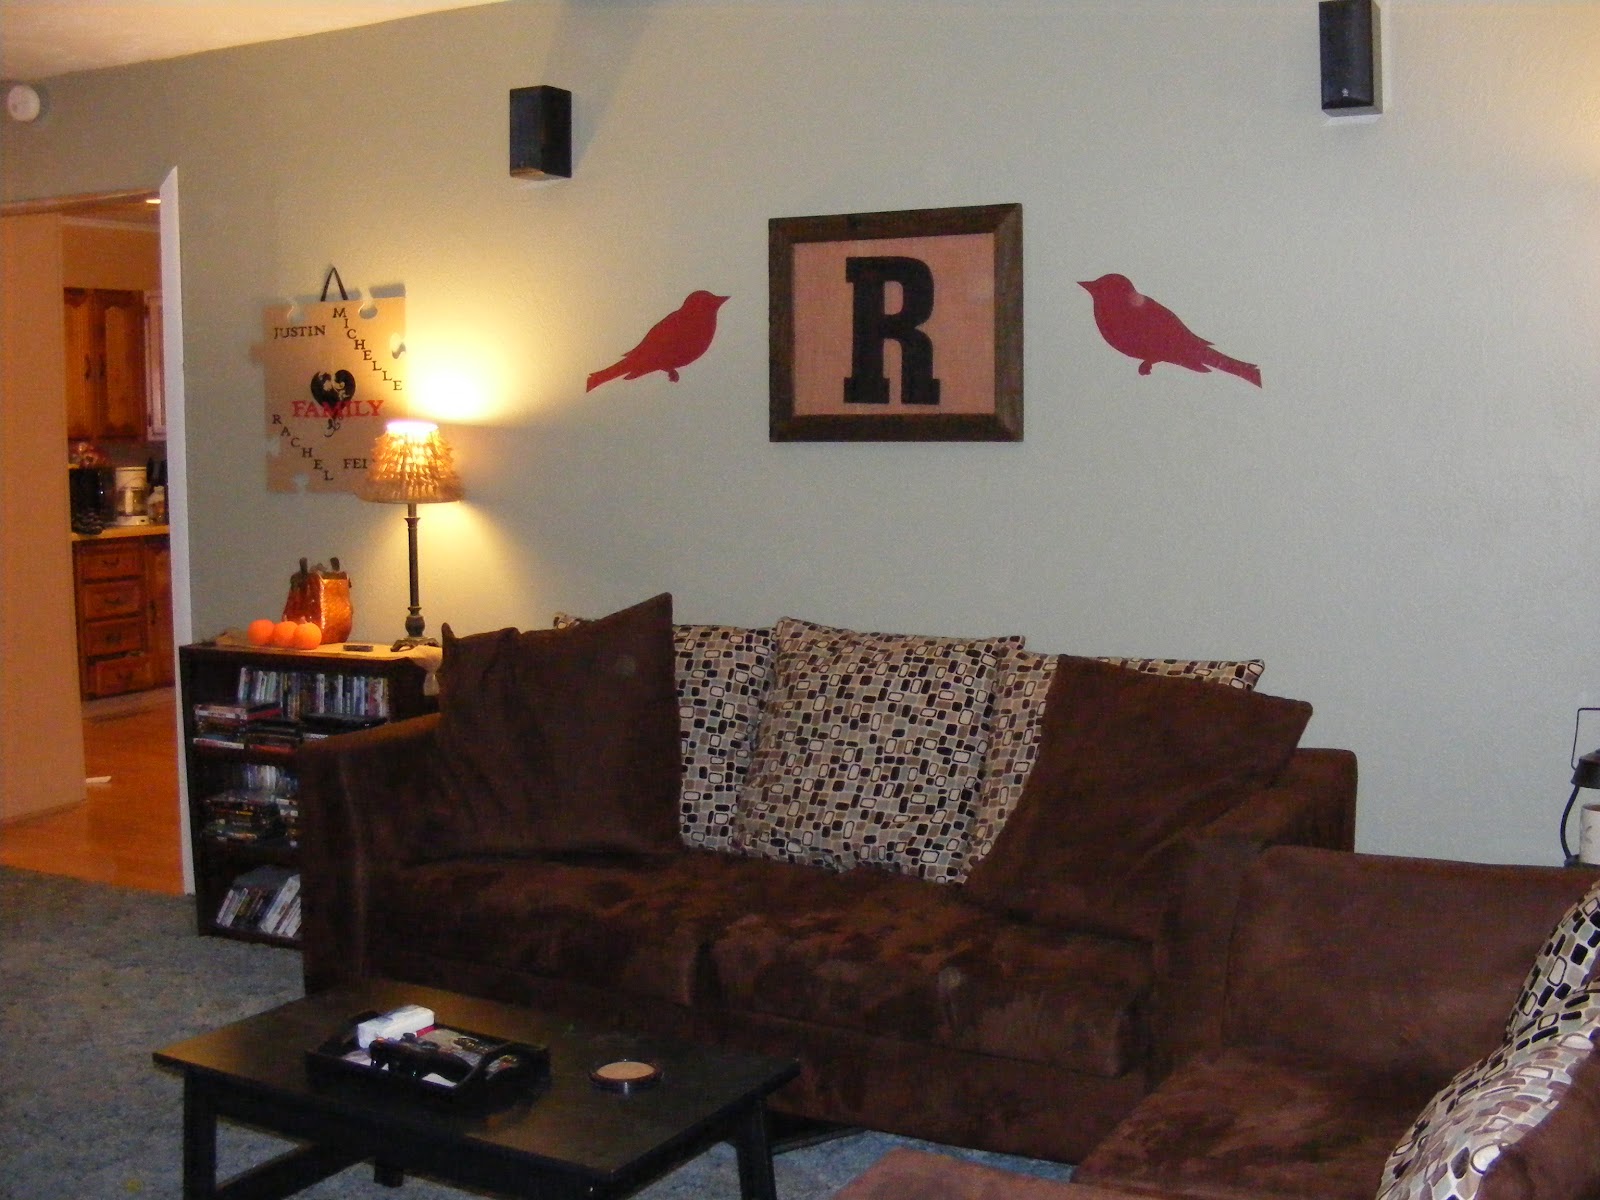
The birds are stickers that we made! We used my Cricut and my Home Decor cartridge to cut them out with red vinyl and the hubby stuck them to the wall for me!
 
I can't wait to get some more done, but we've already made a lot of progress!
 
More to come! :)


Saturday, October 13, 2012

Master Bedroom Redo!

It's been another busy weekend in this house! This time we attacked our bedroom. It doesn't even feel like the same room.

Here is the before we moved in photo:


Don't act like you aren't jealous of those sexy lace curtains. Too late, I've already donated them to the thrift store... sorry guys.
Anyway, here are the after photos!

Welcome to our room! We bedding is from Kirklands.com for $99.00! (I am totally in love and can't wait to sleep in it tonight!)

The X's and O's are 9.5 inch letters from Hobby Lobby that I painted black and the hubby hung up with double sided poster strips.

The paint color is Samovar Silver from Sherwin Williams. As far as I'm concerned it's the PERFECT silver/blue color.

Also, have I ever mentioned that my husband BUILT me this bed? Yep, ONE DAY while he was home on leave when I was at work. Amazing.


Here is the dresser we repainted black last weekend.

The branches on the wall are painted on. I cut the branches out with my Cricut. (Home Decor Cartridge) Then, I used my projector to project them on the wall. After they were in place I traced them with chalk and spent practically half of my life painting them by hand.

Ok, just kidding. It was only a couple of hours. And totally worth it.

We made the "God gave me you" sticker with my Cricut and some vinyl.


All in all, I'm very happy with our progress! The living room is next! :)

Saturday, September 29, 2012

Girl Race Car Bedroom

First off, guess what is impossible to find on Pinterest? Girl Race Car Bedrooms..... and they aren't many race car room ideas anyway. So, this took a whole lot of planning on our part!
Here is Fish's room when it was on the MLS listing.


It amazes me that this is even the same room. Also, take a moment to notice the huge desk. This is already a pretty small room. Add a huge L Shaped desk and I almost felt bad for putting her in this bedroom.
You should have seen us move that thing. It was GLUED together. And I have zero upper arm strength so helping my hubby move the desk to our Office/Craft Room was like the most.fun.ever.
Anyway.... back to the bedroom!
Can you believe my little girl is telling me she wants to be a race car driver? When she decided she wanted a race car room my husband ran with it.
He found a template for a race car bed at WoodCraft.com for $15. Then, he spent two weeks putting it together.


Just another reason why I love that guy. :)

It's hard to believe that the pile of wood and hardware he started out with ended up as this....


Black comforter, pink sheets and pink curtains are from Walmart. I made the checkered curtain with fabric from Hobby Lobby.

The flags that are being held by the monkey were super easy to make. I cut up different bandannas that I picked up from Hobby Lobby and hot glued then onto wood dowels.

The stars on the wall were unfinished wood stars from Hobby Lobby.

I made the bow holder by painting a plaque and then adding ribbon and a race car... from Hobby Lobby...


Are you noticing a trend?

No, Hobby Lobby doesn't pay me to blog. And I don't work for them. I wish I could but my husband says I would spend my paycheck at work before I could even get it home. He's probably right.

I hate it when he's right.


While we are on the subject of Hobby Lobby they were having a 50% off sale on metal men's decor this week. The stop sign, Nascar sign the stoplight were a total of $15.00. Score!


Ohhh See that car on the race track?

Here are some more:


I attached velcro to the bottom of the cars and also to the painted on race track. I added hot glue to the velcro dots on the wall...

and I will just have to see if they are still on the wall tomorrow! They seem to be holding really well though.

Of course every good race needs to have a stadium full of fans!

We used 4 inch, 6 inch and 8 each shelves and attached them to the wall with brackets.


The wrestlers are quite rowdy though... so they had to sit on the other side. Can't have them mingling with the Barbies, babies and stuffed animals. That would get K-razy.


I mean, I was intimidated putting them on the shelf.

All in all I LOVE how the room turned out and so does Fish. Hopefully this will continue for at least 5 years!

Sunday, September 16, 2012

Rae's Room Revealed!


After a very long, yet very productive weekend, the hubby and I got Rae's room painted and decorated!

Here is the before picture from the MLS listing:


And here is the after from about the same angle!


We painted 3 of the 4 walls gray. The color is Gray Granite from Colorplace (Wal-Mart)

I made the curtains, memo board and the pillow with fabric I picked up at a yard sale last weekend.

I made the coat rack by modge podging zebra paper to an unfinished wooden rack from Hobby Lobby.


I made the bow holder with a plaque from Hobby Lobby also! I modge podged zebra paper onto it and cut out the fleur de lis and letters with my Cricut! Then I just added ribbon to the bottom to hold the bows and ribbon to the top for hanging!

While at yard sales I also found this wood shelf for $2! We spray painted it black and now Rae has a place for all of her nail polish and head bands.


This is my one big accomplishment for the day! I found a projector at the thrift store a couple of months ago and knew I would need it for some projects in the new house. I borrowed a Cricut Cartridge called Rock Princess from my mom. I cut out the skull and cross bones shape onto paper and then projected it onto the wall.

Once we had it positioned where we wanted it, the hubby and I traced the outline with chalk onto the wall. I painted this wall pink on Friday night (the color is "Love St. Valentine's Day", by Colorplace at Walmart... who comes up with these colors, anyway?) so it was dry and ready to go today!

I just painted in the chalk outline with gray paint and let it dry. I painted two coats and it covered the crazy hot pink pretty well!

Rae came home this evening and she approves... thank goodness, because she's living with it for a while!

I found a lot of my inspiration from Pinterest... I'm not sure how I ever lived without that site. Check it out and follow my boards... I love followers! 


Friday, September 14, 2012

Sneak peek of rae's room!

I started painting rae's room tonight! Here is a sneak peek!

More pics to come after this weekend!


Sunday, September 9, 2012

Easy peasy corkboard revamp

There is nothing like a quick craft project while watching Larry the Cable Guy to help you wrap up a Sunday night! I'm gearing up to start working on Rae's bedroom makeover next weekend. I've already gatheres her up quite a few wall hangings but every girl needs somewhere to hang up her randomness, right?
This weekend we went to many many garage sales and I picked up this super cute leopard fabric. Now we were planning a zebra and hot pink room but I think by adding a few accesories the leopard is going to work out quite well!
What you need:
A corkboard - I got mine from walmart for $4 on clearance
Fabric- amount depends on the size of the corkboard. I used probably half a yard.
Ribbon to match your fabric. I ended up using the entire roll.
Hot glue gun and glue sticks.
Lay your fabric on the floor under your corkboard and cut the edges just so they are a couple of inches bigger than the board on each side.
To attach the fabric to the back of the board I started with folding each corner in around the back of the board and gluing into place. Then I folded all the sides around to the back of the board and glues them into place. Be sure to pull tightly!
Next I used the black ribbon attached one side to the back of the board. I criss crossed each piece over the front of the board before hot gluing into place on the back. I did this several times until I liked how it looked basically, so just play around with it. I used quilting tacks to secure each X into place.
On the back I attached a loop of ribbon with hot glue to hang it on the wall.
The whole project took less than 30 minutes and i love the results!

Monday, July 16, 2012

Fried Okra


Leave it to crazy Midwestern people to find the need to fry EVERYTHING.

Believe me, there is not much better than fried okra and ranch dressing.

We picked up a package of okra and dredged each piece in a mixture of egg and milk and then coated it in flour with some seasoning salt. We fried it in a skillet with vegetable oil until the batter was browned.

Quick, easy and super delicious!