I am always looking for ways to keep my grocery bill down. One of the best ways I found is by doing at least one meatless meal a week. This is a new one I tried this week. The kids LOVED it. My oldest even had seconds!
3 Lasagna noodles
jar of spaghetti sauce
1 tub of ricotta cheese
1 cup of mozzerella cheese
1/2 cup of parmesean cheese
Preheat the oven to 375.
Boil the lasagna noodles until soft. Meanwhile, mix together the ricotta cheese and 1/4 cup parm cheese.
Put 1/4 cup of spaghetti sauce on the bottom of an 8x8 pan. Cut each lasagna noodle in half and lay two of the halfs side by side on top of the spaghetti sauce. Next, take 1/2 of the cheese mixture and spread it on top of the noodles. Add 1/3 of the spaghetti sauce.
Repeat the first layer with two more noodle halves, the rest of the cheese mixture and more spaghetti sauce.
For the third layer use the two remaining noodle halves, the rest of the spaghetti sauce and top with moz cheese until it is well covered (about a cup). Sprinkle with 1/4 cup of parm cheese. Cover with foil and bake for about 20 minutes. Let cool for 5 minutes before cutting and serving.
Yumtastic. :)

Thursday, May 19, 2011
Tuesday, May 17, 2011
Weddin' Signs
So, I saw an idea of using barn wood to make signs for a wedding a long time ago, but my venue didn't really allow you to stick stuff in the ground, so I had let it go.... until now.
Since we have moved locations, I know that I can use them so I thought I would try a low cost approach.
I still had some cardboard left from my "R" project and cut up the rest of the box to make the signs. I painted them white, added letters and arrows that I cut out with the cricut on some white posterboard and then attached some wood dowels with hot glue. I doubled them up on the big sign since that one is a little bigger and will be by the highway. :)

DIY Twine Wreath

Anyway, while on my weekly trip to Dollar Tree I picked up a woven craft wreath and got really excited for my new project. I also picked up some twine from Hobby Lobby ($2.99) and some daisies from Dollar General. I already had a wooden R at home that has just been waiting to be used. So I painted it black in anticipation for this. :)
I started Sunday by wrapping the twine around the wreath. I tied it in a knot at the top and started my journey around it. I used hot glue every five or so inches to keep it secure. This took me (no joke) about three hours combined. NOT an fun task. It was easy, just very time consuming and my hands hurt like heck, I started complaining on facebook after the first 1.5 hours.
Once I finally got everything wrapped up I pulled some of the daisies off of the bush that I picked up at Dollar General and glued two and my R once I was happy with their position.
To hang it I used black ribbon to make a bow and attached a daisy to the middle of the bow. I used some blue ribbon I had sitting around to loop the top and glued it place, using the daisy to hide the ugly-ness of the hot glue connection. :)
Once I was done I was sooooooo excited to hang it on my door.... but I realized that the nail in the door is about eye level to me and the wreath would hang to about my belly. :(
So, I bought a wreath hanger from Wal-mart this evening and it will not stay in place, when I shut the door the wreath sticks out about 6 inches, so it is now proudly hung in my doorway. SIGH.
Oh well, at least we can enjoy it. Total cost? $7
wreath: $1
twine: $2.99
flowers: $3
total: $6.99
Sunday, April 24, 2011
Happy Easter!
I wanted to take the time tonight and make sure that today was all about bunnies and chocolate, so after dinner the girls and I sat down and I read them the story of Easter... it's not the first time they have heard it, but I think it was a nice reminder. Here's the site I used: http://childrenschapel.org/biblestories/easter.html .
Also, ever wonder what the Easter Bunny has to do with Jesus?
Quick answer: Nothing at all!
Long and very intersting answer: http://news.discovery.com/history/what-does-the-easter-bunny-have-to-do-with-easter.html
I learned a lot from this and she said it better than I ever could have!
Happy Easter everyone!
Sunday, April 17, 2011
Cupcake Stand!
I finally got around to decorating my cupcake stand this weekend. I ordered it from Saveoncrafts.com. The shipping was pretty quick (less than a week) and the price was great. However, the price for shipping was too high. (I can't remember what it was since this was like last month). This was still the best deal I found on a cupcake tree, so I'm pretty happy.

Assembly was easy as pie and decorating wasn't bad. It was a fun little project. (powered by Amp'd apparently?) Now I just have to figure out what kind of cupcakes and small cake for the top to make! Luckily, I have an awesome friend that is also cupcake crazy helping me. I'll let ya'll know what I find!

Assembly was easy as pie and decorating wasn't bad. It was a fun little project. (powered by Amp'd apparently?) Now I just have to figure out what kind of cupcakes and small cake for the top to make! Luckily, I have an awesome friend that is also cupcake crazy helping me. I'll let ya'll know what I find!
Easter Basket with love coupons
I really hate the fact that he can't be here for holidays, but the fun thing about him being stationed elsewhere is coming up with things to send to him.
Since Easter is coming up I thought it would be fun to make him an Easter basket to send over. Thankfully he has his own room, so I don't have to worry about him being made fun of for the goofy stuff his wife sends.
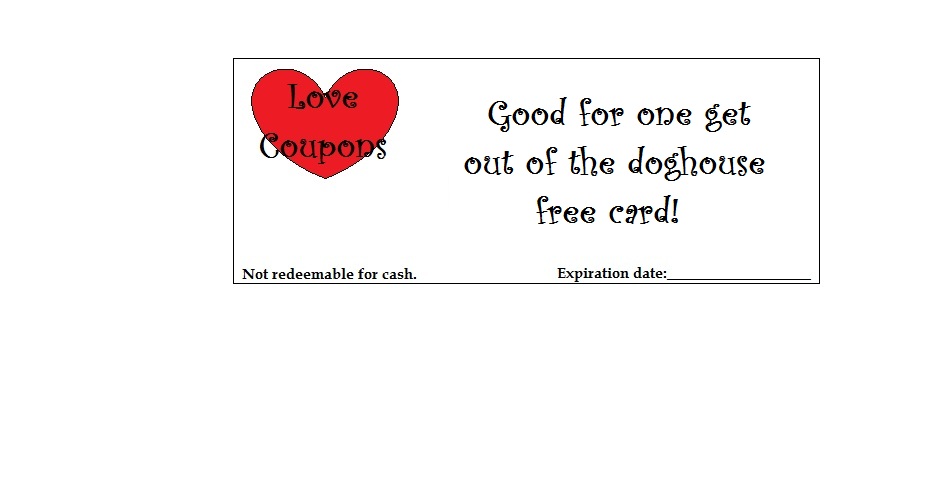
I picked up a tin bucket at Dollar Tree and covered it in camo scrapbook paper. Then I threw in some candy, a game and some plastic eggs. Instead of just filling the eggs with candy I made some "Love Coupons" for him to redeem when he's home (or whenever!).


 I printed them off as photos, 3.5 x 5 size. It cut off the border on the right, but 4x6 will print the entire image. I wrote NEVER! as the expiration date and then rolled them up and stuck them in the eggs.
Here is my template if you want to make your own:


Since Easter is coming up I thought it would be fun to make him an Easter basket to send over. Thankfully he has his own room, so I don't have to worry about him being made fun of for the goofy stuff his wife sends.
I picked up a tin bucket at Dollar Tree and covered it in camo scrapbook paper. Then I threw in some candy, a game and some plastic eggs. Instead of just filling the eggs with candy I made some "Love Coupons" for him to redeem when he's home (or whenever!).


Here is my template if you want to make your own:

Here is my finished basket:

I tied everything together in one of those cellophane basket bags and stuck it in a flat rate box. Now I just have to find time to make it to the post office!
Sunday, April 3, 2011
New Wedding Hair?
Last night my best friend and I went to a concert featuring a local band. While getting ready (and I was totally rushing) I had the urge to shrunch my hair. However, I had never tried it and decided that if I made my best friend late because I was having hair issues, well, I would just suck. So... I gave up for then, straightened my hair real quick and was ready two minutes before time to leave. Sigh.
However, today I thought I would give it a shot and I was so happy with the results! I started with damp hair and used a ton of moose to scrunch it up while hanging my head upside down. After I was done I carefully pulled some together on top to create a bump and held it in place with a little claw clip. I finished off with a bunch of hairspray (super windy day here).

I think this is how my hair will end up for the wedding. My hair doesn't like to hold curls well from a curling iron and I have had many failed attempts in the past few months. This held all day in windy weather, in humidity and while I took a cat nap on the couch.
What do ya think? What is or was your wedding hair plan?
Subscribe to:
Posts (Atom)